A spring over axle swap is a great way to get a lot of lift and
get great articulation. The lift from a spring over axle swap
comes from not changin springs, but by changing the way the
axles mount on the springs. The CJs and Wrangler YJs have the
axles mounted on top of the springs (spring under). If the
axles are modified so they mount on the bottom of the springs
(spring over), there will be at least 5" of lift.
Granted, it is easier to install a regular lift kit where everything
is thought out for you, but the results won't be the same. The
flat stock springs articulate better and there is plenty of room
for big tires. The biggest obstacle to most people with the spring
over is you need to be able to weld or know someone that can weld.
If you can get over this hurdle, it is well worth the effort.
I did my spring over swap as part of an axle swap using early
Bronco axles, so that complicated it to some degree. This article
covers issues that would come up on any Wranlger spring over axle
swap.
Springs
I already had a OME 2.5" lift springs before I did the spring
over axle swap. I kept the rear set and I purchased a pair of rear
YJ OME J1R springs I found at a wreckers (woohoo!) to replace my
front ones. The rear springs have a higher spring rate and I wanted
to use them in anticipation of the weight of a winch to come later
this year. The higher spring rate will also help minimize spring
wrap up front.
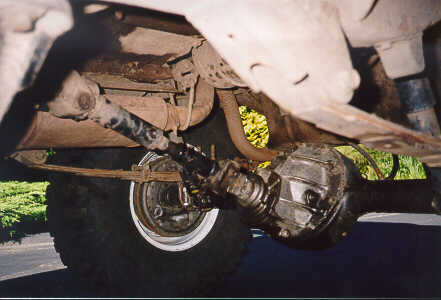
Spring Perches
Both front and rear I used adjustable spring perches to fine tune
the pinion angles. Since I was swapping in an early Bronco Dana
44 up front, I did not have to deal with the problem of integrating
the driver side spring perch into the differential housing. Because
of the amount of lift with a spring over, constant velocity (aka CV
joint or double cardon) drive shafts will most likely be necessary.
This simplifies setting the pinion angle though because with a CV
shaft, you just point the pinion to the transfer case yoke.
 Since I got the pinion angles set right, I have had no driveline
vibrations, which is a relief. The rear shaft is running at about
a 21-degree angle relative to the t-case output shaft, which is steep
even for a CV, but it doesn't bind when the rear axle is articulating,
and I haven't worn out any u-joints yet...
Since I got the pinion angles set right, I have had no driveline
vibrations, which is a relief. The rear shaft is running at about
a 21-degree angle relative to the t-case output shaft, which is steep
even for a CV, but it doesn't bind when the rear axle is articulating,
and I haven't worn out any u-joints yet...
The front D44 was (I think) set up with about 4-5 degrees of caster.
When I had the brackets welded on, I positioned them such that I'd have
around 8 degrees, which seemed to be the conventional-wisdom figure for
springovers. That left the pinion pointing upwards about 4 degrees.
Not great, but I figured the caster was more important than the front
pinion angle. It turns out with this angle, the pinion is just about
pointing at the transfer case yoke. The Jeep handles fine on the
freeway - no wander at all. It might be hard to get the same results
with the stock Dana 30 because YJ front axles come with more caster
from the factory than an early Bronco. Setting caster requires cutting
off the outer parts of the front axle.
U-Bolts and U-Bolt Plates
U-bolts I had made at a local spring shop for cheap, and I found spring
plates at wrecking yards just by walking around until I found some with
the right hole pattern. For the swaybar mounts on the front plates,
I cut the heads off two 6" long 5/8" bolts and welded the stems (is that
the right word?) onto the front spring plates. No problemo.
Drive Shafts
 What about the rear driveshaft, I hear you saying? Well, the YJ's
notoriously short rear driveshaft was obviously a problem (especially
with the low pinion on the Ford 9"). What I did to resolve the problem
was purchase a used NP231 tailshaft shortening kit from Larry Soo.
Larry didn't need the tail shaft shortening kit after he swapped
a Dana 300 in his Wrangler YJ when he did a
Scout Axle Swap.
What about the rear driveshaft, I hear you saying? Well, the YJ's
notoriously short rear driveshaft was obviously a problem (especially
with the low pinion on the Ford 9"). What I did to resolve the problem
was purchase a used NP231 tailshaft shortening kit from Larry Soo.
Larry didn't need the tail shaft shortening kit after he swapped
a Dana 300 in his Wrangler YJ when he did a
Scout Axle Swap.
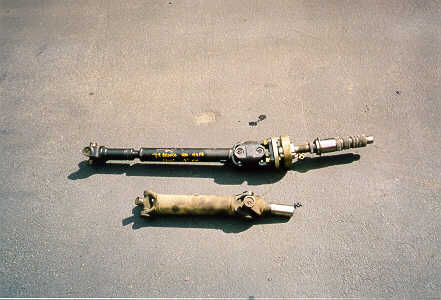
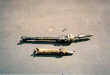
For the rear shaft I used parts from a 80-something Monte Carlo
and from a full size late 70s Bronco. This matched the hole
pattern of the CV flange on the tailshaft
kit. On the left is a CV joint shaft with the tailshaft eliminator
kit on top and the original YJ drive shaft on the bottom.
 In the front, I used a the front CV drive shaft from a '97 Wrangler TJ
that I happened to find in a junk yard. When I had the shaft
lengthened, I had it done with a larger 2" 0.120" wall tubing.
In the front, I used a the front CV drive shaft from a '97 Wrangler TJ
that I happened to find in a junk yard. When I had the shaft
lengthened, I had it done with a larger 2" 0.120" wall tubing.
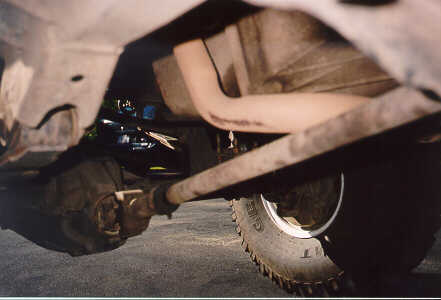
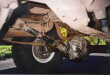
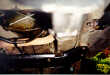
 I had to cut a notch in my skidplate (pictured
to the right) to have clearance between the front shaft and the
skid plate. There is still a slight conflict with the front shaft
and the exhaust pipe between the manifold and cat. This probably
wouldn't be an issue if you were not swapping in a front early
Bronco Dana 44.
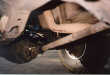
In the picture on the left, you can see the scuff marks from the
contact made by the drive shaft. I had a custom exhaust pipe bent
from the manifold to the cat.
I had to cut a notch in my skidplate (pictured
to the right) to have clearance between the front shaft and the
skid plate. There is still a slight conflict with the front shaft
and the exhaust pipe between the manifold and cat. This probably
wouldn't be an issue if you were not swapping in a front early
Bronco Dana 44.
In the picture on the left, you can see the scuff marks from the
contact made by the drive shaft. I had a custom exhaust pipe bent
from the manifold to the cat.
Shocks
Once the axles were in, I was able to measure the extended length
of the shocks I'd need. My friend Larry gave me a set of stock
rear shocks from an F250 or F350 that fit perfectly for my rear
end, and I bought some nice long Rancho RS5012s for the front
(34" extended!).
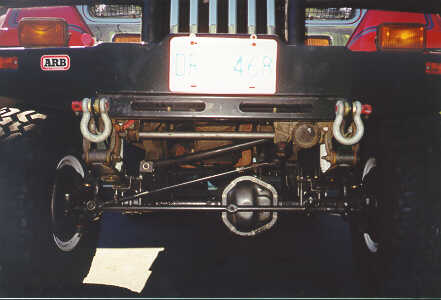
Steering
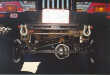 A dropped pitman arm was required with the drag link and tie rod
configuration I used. I used a 4" drop pitman arm on the same trip.
Even so the drag link is at a pretty severe angle, but it is parallel
to the track bar which minimizes bump steer. The bump steer is real
bad with no track bar up front. I've used a 7/16" clevis pin to
connect the track bar to the axle bracket for a
quick disconnect (thanks to Dave Gray for that idea).
A dropped pitman arm was required with the drag link and tie rod
configuration I used. I used a 4" drop pitman arm on the same trip.
Even so the drag link is at a pretty severe angle, but it is parallel
to the track bar which minimizes bump steer. The bump steer is real
bad with no track bar up front. I've used a 7/16" clevis pin to
connect the track bar to the axle bracket for a
quick disconnect (thanks to Dave Gray for that idea).
Even with the drop pitman arm, the drag link angle is steep enough
that the ends in the drag link rotate every time you change the
direction of the steering wheel. The drag link pulls upwards and
downwards at the same time it pulls left and right, respectively.
The only fix I can see is a Z-bent drag link, which will also
improve clearance between it and the right-side spring. Not sure
if I might lose too much strength to be worth the improved steering
though.
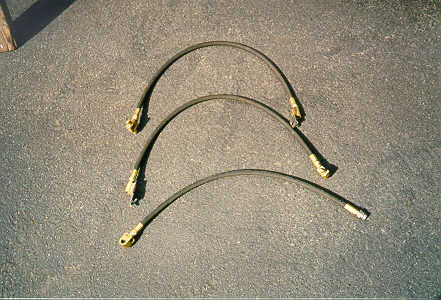
Brakes Lines
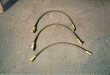 I got some extended brake lines from Coast Industrial on Vancouver
Island. I mailed them the necessary used YJ, Bronco, and Chevy brake
line fittings, and they sent me a set of three lines made to order,
with my fittings brazed onto their generic ones. They have a woven
steel core coated in rubber, nice and strong. Thanks to Rob Bryce
for this referral! Check locally for a shop that builds custom
hyrdaulic lines to help you here.
I got some extended brake lines from Coast Industrial on Vancouver
Island. I mailed them the necessary used YJ, Bronco, and Chevy brake
line fittings, and they sent me a set of three lines made to order,
with my fittings brazed onto their generic ones. They have a woven
steel core coated in rubber, nice and strong. Thanks to Rob Bryce
for this referral! Check locally for a shop that builds custom
hyrdaulic lines to help you here.
For the the parking brake working using two long-side YJ cables and
upgrading to the much-improved 90's type parking brake adjuster at
the same time.
Axle Wrap
Surprisingly, axle wrap has not been a huge problem. It's there,
and I do plan to fabricate and install a rear anti-wrap bar in the near
future, but truth be told it's not as necessary as I thought it would
be. Spring sag has also been very minimal; the progressive-rate OME
springs have held up really well, but I'm careful not to bounce too hard
on them, to avoid taking them into negative arch. Some extended
bumpstops are in my plans for the near future as well, probably just
some pieces of rectangular tubing bolted to the ends of my u-bolts on
each spring plate.
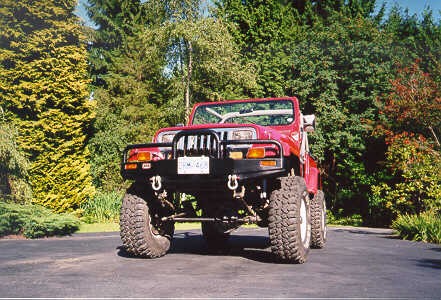
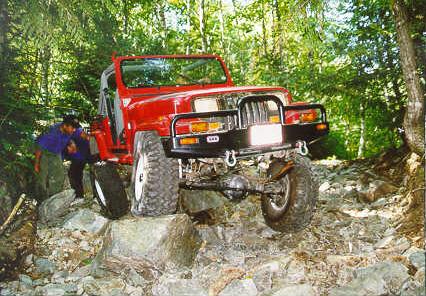
Conclusion
Looks pretty good if I say so myself, and man oh man does it flex!