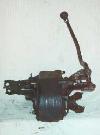
|
Jeep CJ Dana 300 Transfer Case U-Bolt Upgrade


The Dana 300 was used in CJs from 1980 until
1986 is probably the best all around transfer available in
the CJ. It features a heavy duty cast iron case, gear drive,
and a respectable 2.62:1 low. It shares a flexible input pattern
that is used with many of the modern transfer cases of today and
it's helical cut gears operate quietly. There are always ways
of improving a good thing though, fortunately for the Dana 300,
the improvement is easy and fairly inexpensive.
The only mistake Jeep made putting the Dana 300 in the CJ was
by changing from U-bolt yokes used on the Dana 20 to strap type
yokes. The straps tend to loosen and break easier than the
U-bolt yokes. Converting the Dana 300 to U-bolt yokes doesn't
cost too much and it requires only a few common tools. The tools
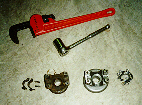
required include:
-
1/4" 12 pt. socket and socket wrench to remove strap bolts.
-
1 1/8" socket and socket wrench to turn it. This is needed to remove
and replace the yoke retaining nut.
-
18" pipe wrench or other wrench large enough to clamp on to the yoke.
-
1/2" open end wrench to tighten U-bolts.
-
Torque wrench to tighten retaining nut.
I've heard that the yokes from a Dana 20 will fit on the Dana 300,
so if you have a Dana 20 with decent U-bolt yokes or if you can find
one in the core pile at your local yard, you might save some money.
I just went out and bought new yokes since I didn't have a Dana 20.
Part of the motivation for this project was to replace a bad yoke
that had been damaged and no longer held the u-joint firmly causing
some driveline vibration. I ordered two yokes (Spicer part 2-4-2461X)
and two U-bolt kits (Spicer part 2-94-28X). When I installed the
yoke on the front output, I found that the flange protecting the
seal was too large. I hammered it off and used the flange from the
old yoke. There probably is a part that will perfectly replace
the front yoke, but I do not know the part number.
Here is the step-by-step process of replacing the yokes:
-
Block tires so your Jeep doesn't roll away.
-
Remove the driveshafts with 1/4" 12 pt. socket
-
Hold the old yoke with the pipe wrench while removing the yoke retaining nut
with 1 1/8" socket.
-
Remove old yoke and slide on new yoke.
-
Hold new yoke with pipe wrench while tightening yoke retaining nut to 120
ft/lbs (162 N/M)
-
Reinstall drive shafts with U-bolts and tighten with 1/2" wrench.
I did the rear first and then removed the skid plate/cross member to
do the front, after properly supporting the transmission of course.
I think that the yoke retaining nuts should technically be replaced
since they are locking nuts, but I reused mine with no problems.
Check out the article
Jeep Axle
U-Bolt Yoke Upgrade for information about upgrading
your axle yokes.
Last modified Wednesday, 01-Dec-2010 09:13:43 MST
[
Jeep Tech Main Page |
Terry's Jeep Page
]
Copyright © 2001, 2000, 1999, 1998
JEEPTECH.COM
All Rights Reserved, All content with exception of private works and
corporate trademarked logos are property of Jeeptech.com
|